Showing posts with label Detailed Observation. Show all posts

Tuesday, 7 October 2014

Drawing 1, Part 2 Observations in Nature, Detailed Observation - Check and Log

Which drawing media did you find most effective to use, for which effects?
For me I love pencils I've been developing my pencil skills more and more on this course and I have got to the stage where I am doing less and less smudging and more and more hatching using my pencil at different angles with different holding techniques. I really think I did well depicting the tone of the wood and especially the bark in the 'Getting Tone and Depth in Detail' exercise. However I was very happy with my stippling with the Rotring drawing pen on the 'Stipples and Dots' exercise, not only being able to depict the tone of the leaf but also it's texture.
What sort of Marks work well to create tone and texture?
I used a variety of hatching to depict the texture of the tree branch with sporadic hatching to depict the bark and fluid lines and hatching to show the stripped wood all these marks worked really well. I thought I had chosen the wrong type of subject for the stipples and dots exercise but I think I showed the texture of the object really well with dots and patterns of stipples to show creases in the dying leaf.
Did you enjoy capturing details or are you more at home creating big broad brush sketches?
I must admit that capturing details with stipples and dots was a bit tedious but I am delighted with the finished drawing and I really enjoyed working on the tree branch in the first exercise so I can probably say that I am more at home capturing details.
Look at the composition of the drawings you have done in this project. Make some sketches and notes about how you could improve your composition.
The composition and the angles of the subjects that I chose were thought about long and hard before embarking on these exercises, I feel I chose the best compositions that I could to not only capture the full beauty of the objects but to fill the paper.

Drawing 1, Part 2 Observations in Nature, Detailed Observation - Stipples and Dots

For this exercise I was to pick another interesting object and use A4 cartridge paper and a ballpoint or drawing pen. Then use a stippling effect, dots and and a variety of marks to create a drawing of depth and interest.
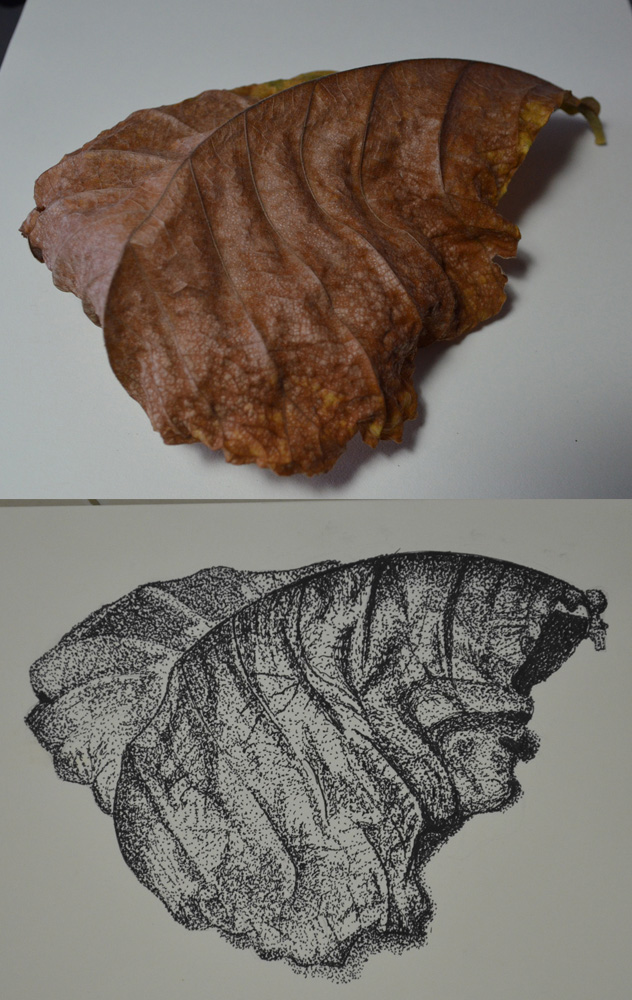
Exercise - Stipples and Dots, Finished Drawing
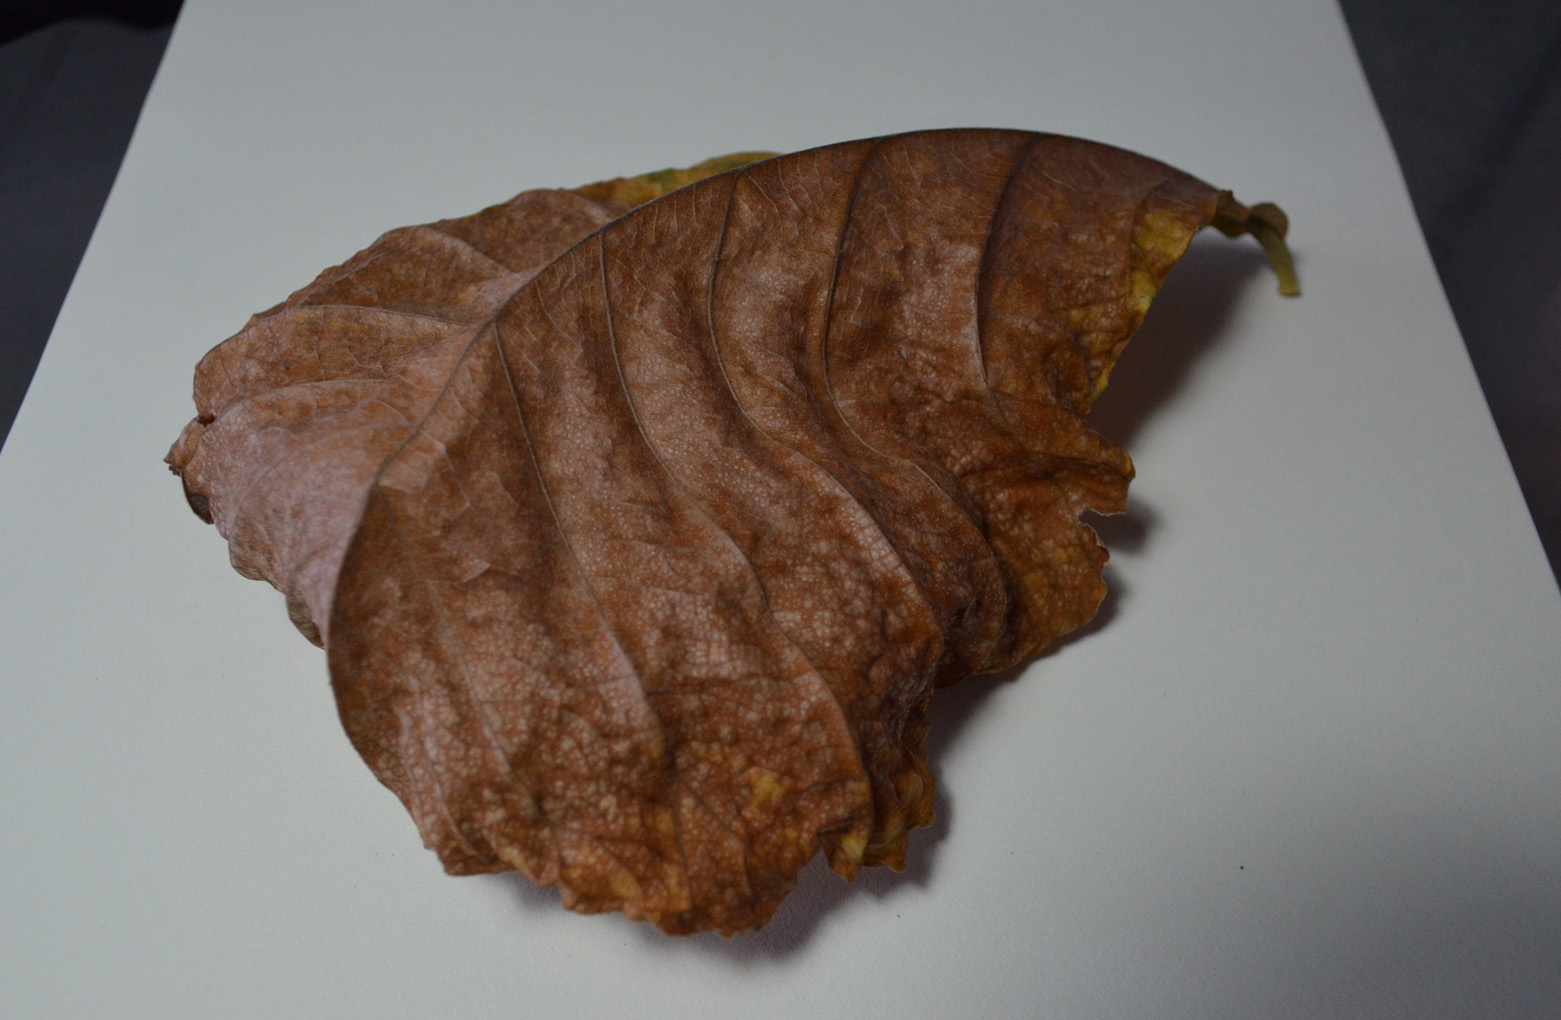
After my research on Eliot Hodgkin I took a walk through the very small park area opposite my school and took some photos of leaves with my mobile phone so I might use them later. When this exercise came up I went back into the park to grab some dying leaves to take home.
Exercise - Stipples and Dots, Leaf Subject
One particular leaf caught my eye as it had some great lines and at the time was half green half brown, so took many photos during the change from green and brown to completely brown and also tried the leaf at different angles, for my drawing I picked out the one above.
I can't say that I love stippling as it is a very slow process and this exercise took me about three hours over two days to complete and since my first assignment was handed in quite slow I'm trying to keep up momentum.
I used a Rotring 0.3 drawing pen and began as I did with other exercises, drawing the light tones by spacing out the dots  and then going back over for the darker tones with more dots. I used a variety of mark making techniques which included stippling, dots, really short hatching and lines and for the creased patterns of the dying leaf I drew the dots in tracks close together and then went back over with more dots.
Exercise: Stipples and Dots Finished
View my learning log for Drawing 1

Friday, 4 July 2014

Drawing 1, Part 2 Observations in in Nature, Detailed Observation - Getting Tone and Depth in Detail

In this exercise I was to practise building up dark medium and light tones principally using pencils and hatching and cross-hatching techniques. I was to select a single object such as a shell or piece of driftwood and get a varied effect by combining soft and medium grade pencils as well as altering the direction of the strokes I make. The brief also informed me that this exercise would be time consuming and indeed it was. I used a smooth sheet of A3 Canson paper and 2B, 3B, 4B, 5B pencils to complete this exercise as well as a putty rubber for the highlights which I used quite often to lighten strokes that were too dark as I made my way through my chosen subject. Living in Bangkok has it's downfalls especially when taking a drawing course but I'm very lucky to have a small park with some very exotic trees in front of the primary school that I teach at. I found a small branch that had fallen or been broken off one of the trees a few weeks ago that reminded me of the hammers in Pink Floyd the Wall with patches of bark still on it and some really nice contours,  so I decided to use it for this exercise.
My subject for this drawing exercise, a tree branch
I started on the end that I knew would be the most difficult to try and reproduce with pencils, the tree bark, going over it first hatching with a 2B pencil then, 3B, 4B and 5B to get the darker tones. I know the brief said use hatching and cross-hatching on this exercise but I threw everything I had at it, including stippling, squirkling and dashes and I think I depicted the surface of the bark quite well. Unfortunately my photographic skills aren't that great and the photo of the finished drawing is not as great as the drawing itself.
Getting Tine and Depth in Detail 1
The area that I thought would be the most difficult was actually the easiest, to depict tone on the areas of stripped branch with soft bare wood was the most difficult, but one thing it did teach me was to be more fluid with my drawing and for the first time ever I loosened up.
Getting Tine and Depth in Detail 2
I know there are flaws in the finished drawing, the shape is wrong in certain places and the shadow isn't brilliant but there are parts of this drawing that I am really proud of namely the  bark area which reminds me of a 'bio' tattoo for some reason. In fact I think the finished piece reminds me of an anatomy drawing and while I was working on it I kept thinking of the Marco Evaristti drawings of parts of suicide victims that I saw during my first visit to the national gallery. Overall I think I did quite well in this exercise, my tutor told me I should be more fluid and I think I managed it while working on this exercise. However, one thing I do have a problem with is drawing the very dark tones on a textured surface such as this which is something I will have to work on.

Wednesday, 14 May 2014

Drawing 1, Part 2 Observations in Nature, Detailed Observation, Line Drawing Detail

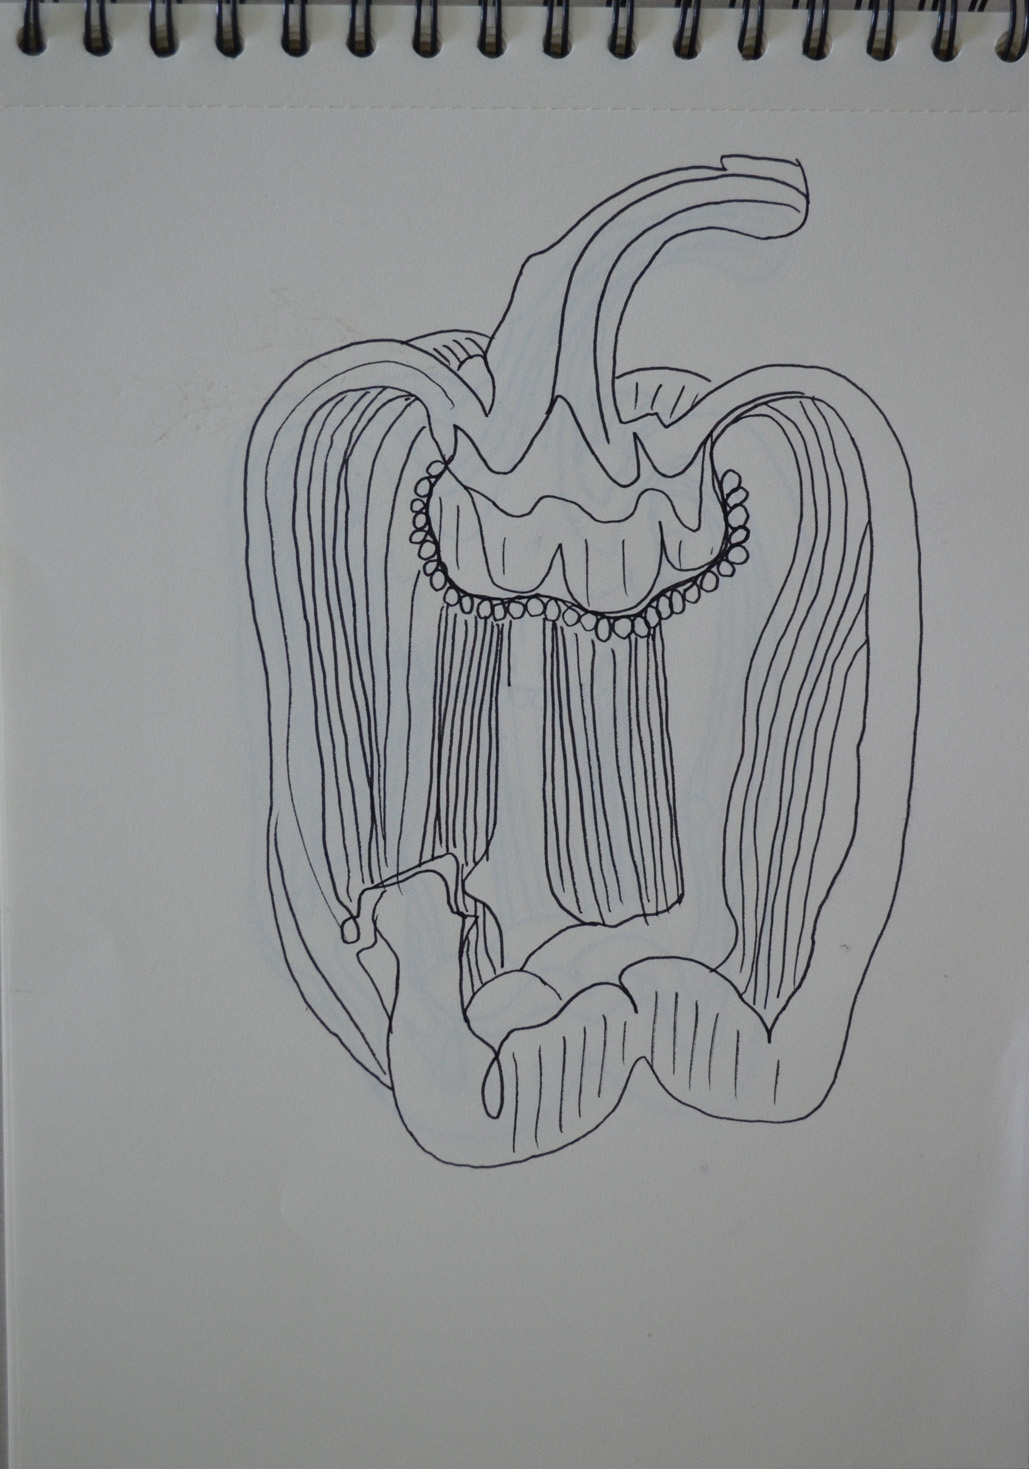
For this exercise I was to select an object with interesting detail such as a sliced through red cabbage or a fir cone. Then on a sheet of A4 paper create a line drawing of the object that I set up, taking time and effort to really look at the patterning, thickness of line, texture and shape of the overall composition. The brief also said that I was to position the drawing well on the paper and fill the paper effectively with a continuous line drawing and no shading which is what I TRIED to do...
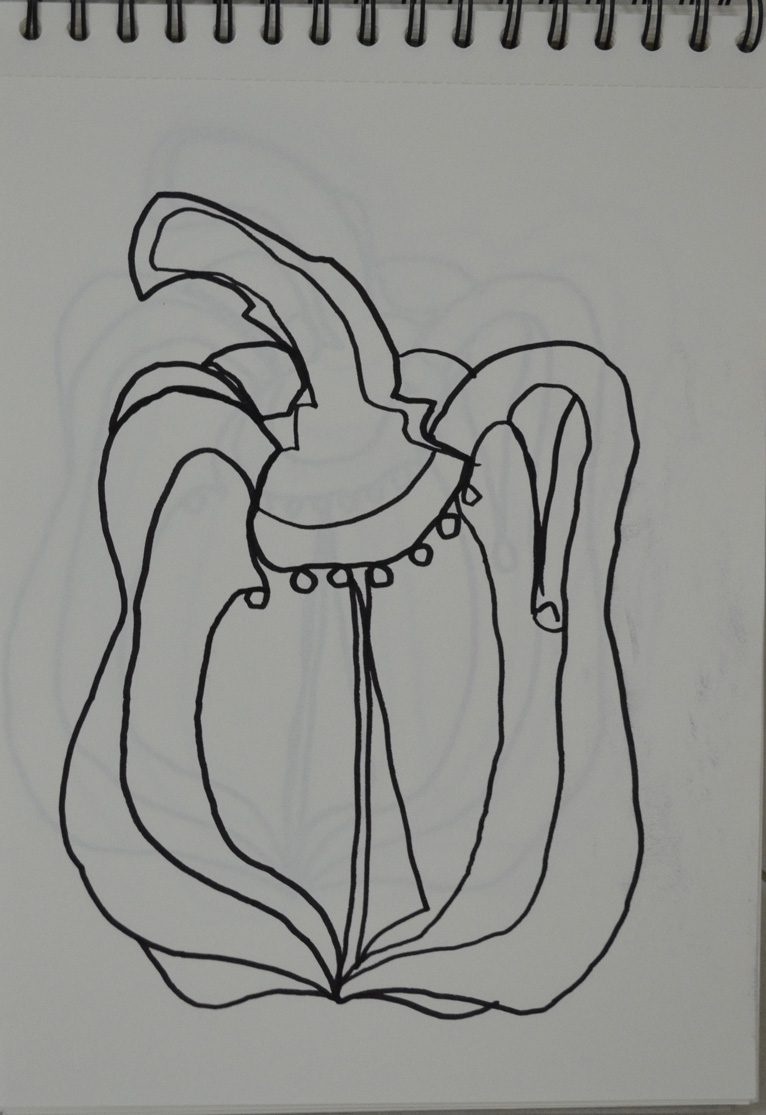
I made a few attempts at this with two different subjects, both of which were green peppers but in the Bangkok heat they go off pretty quick. With the first pepper every attempt was a continuous drawing with minimum detail, I used the thick nib of a double tipped felt pen and although the subject fit well on the paper, I didn't give it a strong enough light source to pick up all the detail and too be honest the finished drawings at that line thickness all looked somewhat pathetic.
Exercise - Line Drawing Detail First Subject
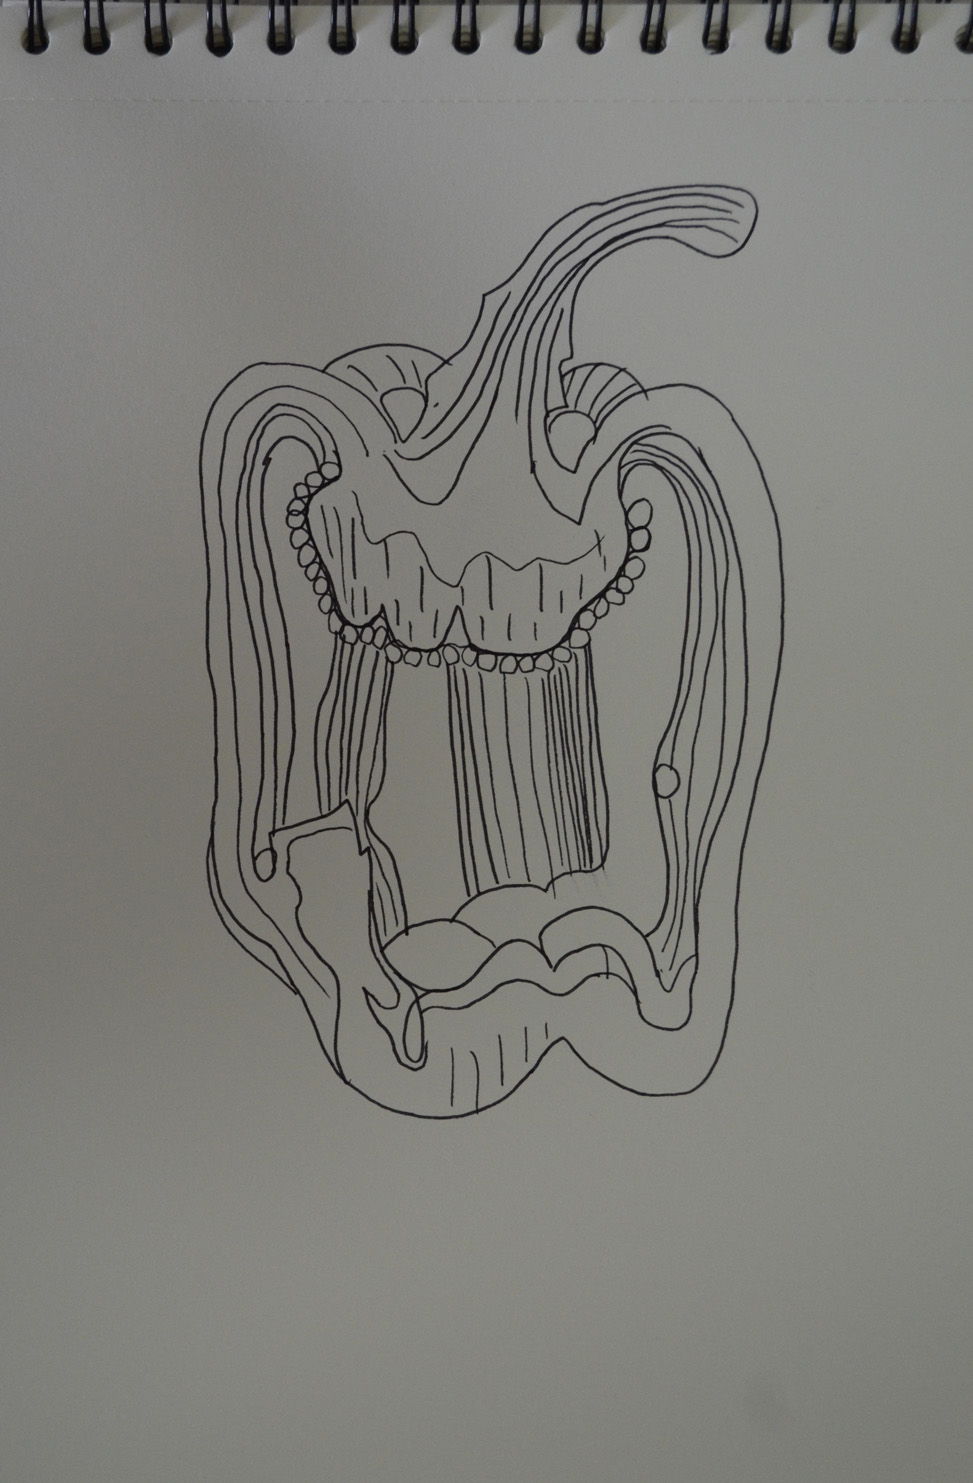
I gave it a week with another exercise in between before I had another go at this exercise. Visually the drawings with the second subject look a lot better, I used the finer nib of the felt pen and this time after I completed what I could do continuously without taking my pen off the paper I decided to add the detail which were the ribs on the inside of the pepper that I could see from wisely using a light source this time.
Exercise - Line Drawing Detail Second Subject 1
Exercise - Line Drawing Detail Second Subject - Image A
I probably did go a bit overboard and it does look like I have had a go at shading the object but this is all down to the closeness off the lines on the inside of the pepper. However I am quite happy with the results.
Exercise - Line Drawing Detail Second Subject 2
Exercise - Line Drawing Detail Second Subject - Image B
The thing that I am not happy with however is the positioning on the paper and how much space I left to the sides and underneath it. When drawing an object such as a pepper with a very irregular shape I think it's best if you know where to start, in Image A above I started at the core just above the seeds. With Image B I started at the tip of the stem Starting near the center of the image was better with this object but that would differ with something like a cabbage.

View my full Drawing 1 Learning log