Showing posts with label Part 2. Show all posts

Tuesday, 4 November 2014

Drawing 1, Part 2, Observations in Nature, Plants and Flowers in Coloured Pencils

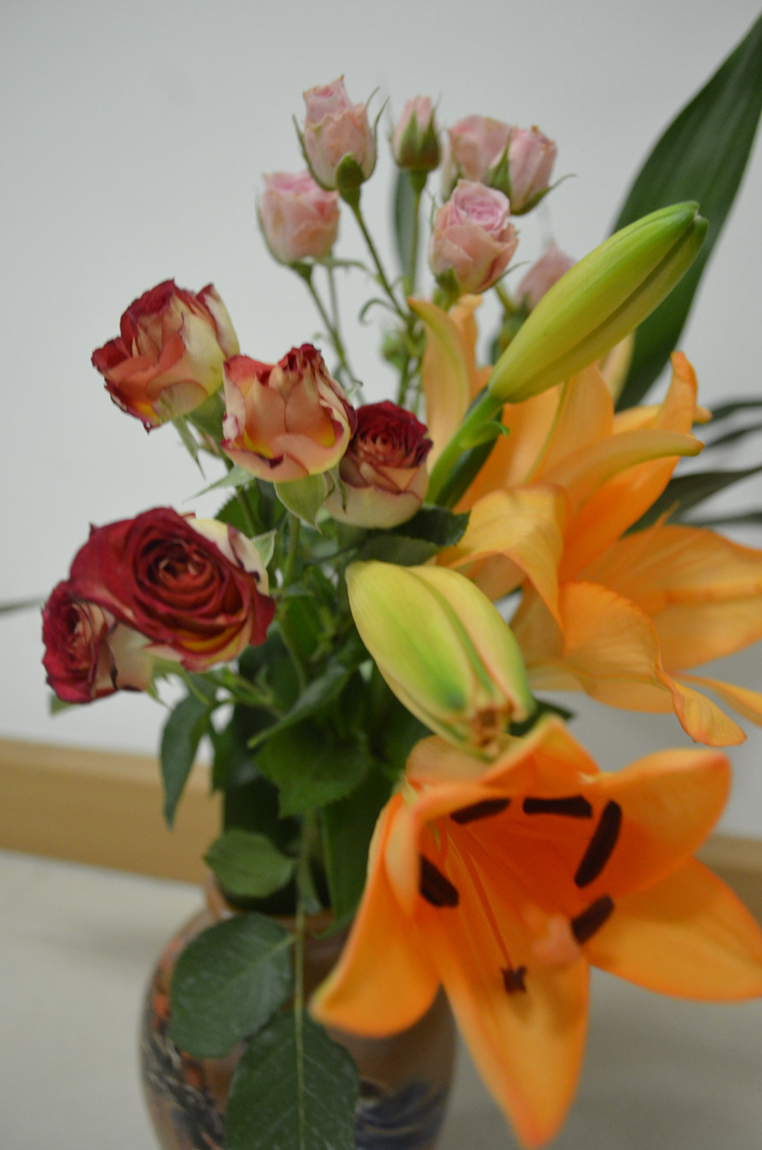
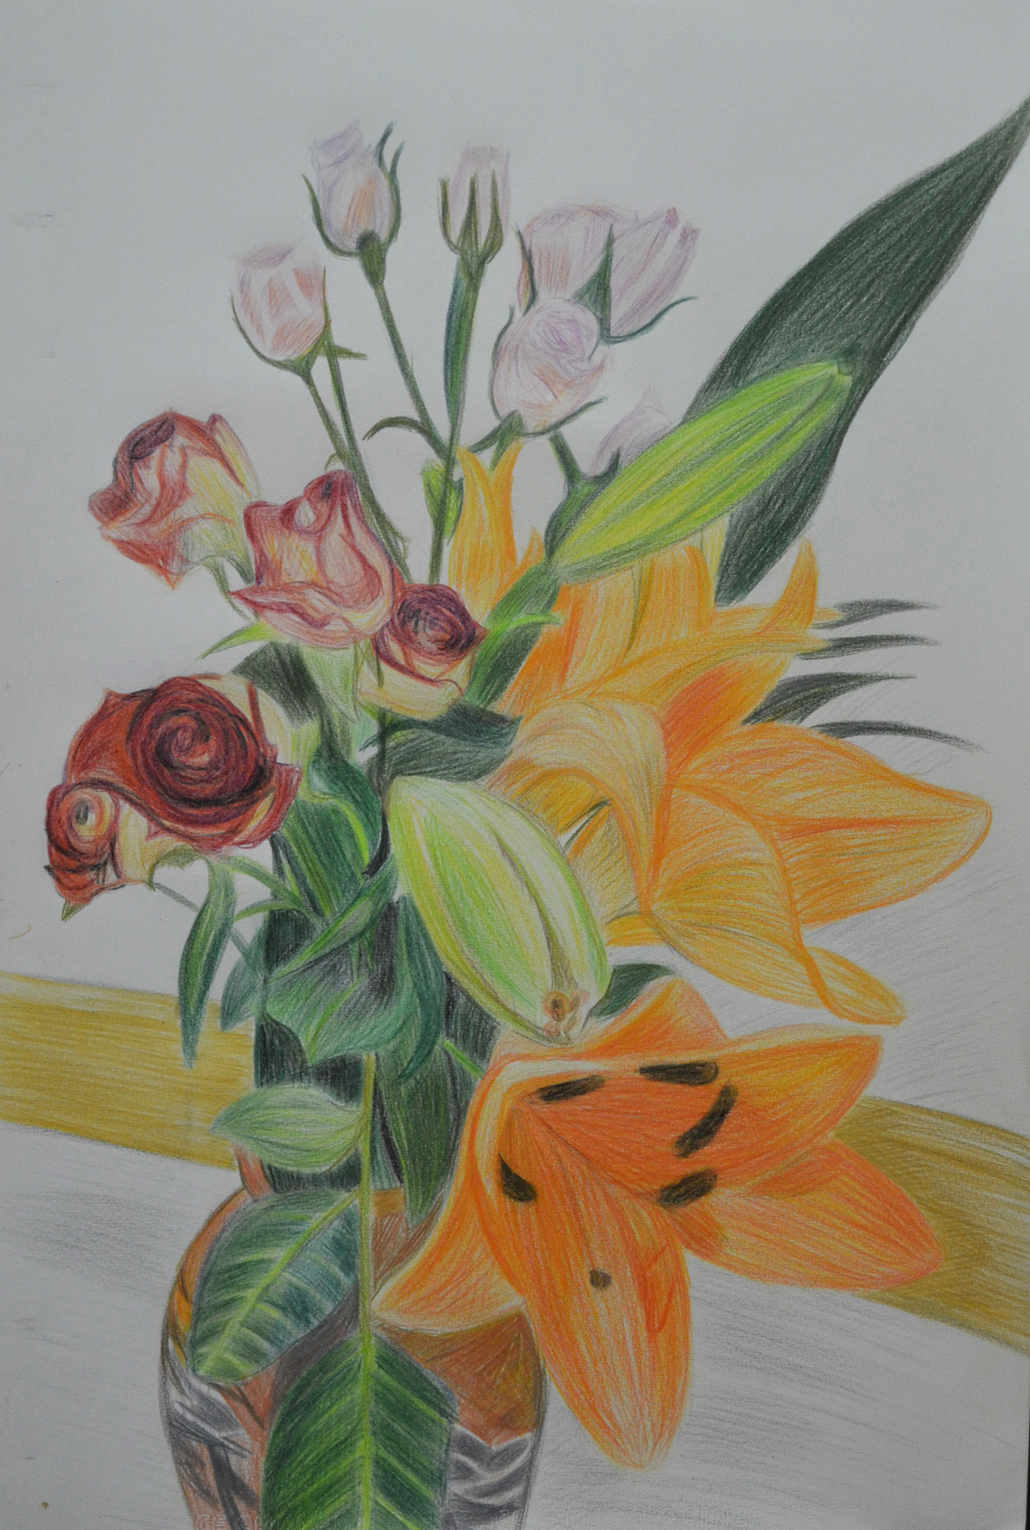
For this exercise I bought an assortment of flowers from the Tops supermarket while I was visiting my kids for a meal for my oldest daughters Birthday. The flowers I chose were orchids and some red and pink roses, I really was not thinking about shapes or colour when I purchased them but I am glad I made the choices that I did. On an A2 sheet of white paper I began to draw.
Roses and Orchids
Roses and Orchids
Now the brief said to experiment with different methods of blending in my sketchbook first, however I thought I had had enough practise blending colour with colour pencils so far in this course so I put pencil straight to paper, for the flowers this was no problem but for the leaves I wish I had done as the brief said and practised a little more.
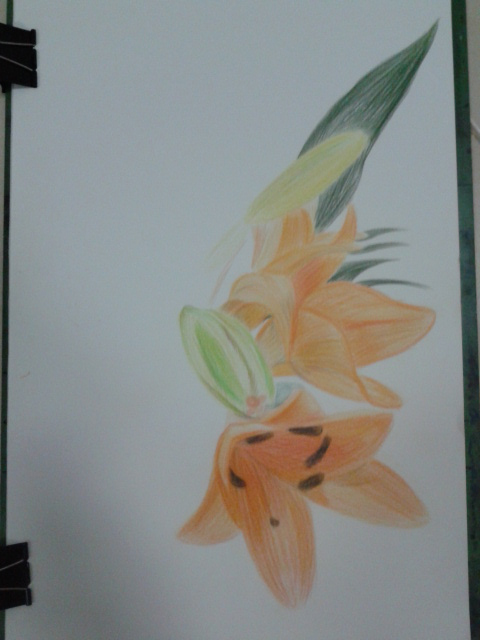
Drawing the Orchid
Drawing the Orchid
I began with a neutral colour for each subject starting with the orchid and working my way around the composition working on the most prominent flowers and leaves first keeping a careful eye on negative space.
Part way through the drawing I read the brief again to find out I had skipped over some valuable instructions:
  • Make the plant the focal point of your drawing but draw the background
  • Do not draw the plant in isolation
  • Draw in the context to give depth and substance to the drawing
The background I had chosen was a plane white wall with brown skirting boards and very pale floor tiles but I decided to carry on and I am glad I did. Using three different types of flowers with large leaves and petals on the orchid the composition and the vase I had placed them in made up the main subject and the background. Placing the largest flowers at the front and the smallest at the back helped me to create a nice three dimensional effect with the large orchid flower taking on the role as the focal point of the drawing.
I used different methods of blending for each of the flowers with layering used on all, the Still Life Group in Tone Exercise early on in this part of the course really helped using 3-4 colours on each flower but starting off with the lightest colour first and working my way to the darkest.
I used long strokes for the orchid to give it a stretching outwards feel and to me it almost seems like it as a life of its own.
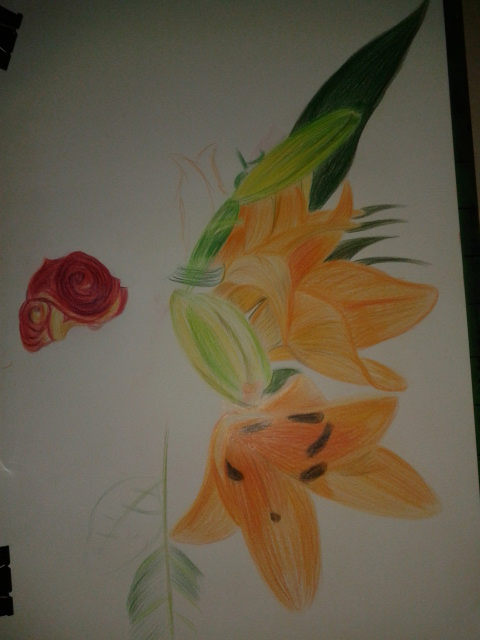
Drawing in the Red Roses
For the red roses I coloured them in a spiral motion then layered the darkest colours over the top rubbing out the colour from time to time to let the lighter colours show through.
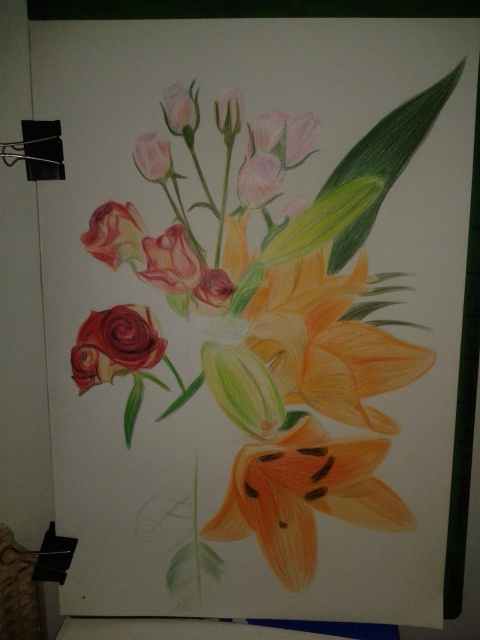
Flowers Complete
Flowers Complete
The pink roses were the most challenging of the lot with the colours and details being so delicate I decided to tackle them in a different way by hatching then squiggling over the top for the flowers where you can see the petals grouped together.
Aspects of the Drawing I am Satisfied with:
I am really happy with the 3 dimensional feel of the drawing and the way the different solutions I came up with to tackle each type of flower pad off. I am also very happy with way the drawing came together using the practise I had from the Negative Space in a Plant Exercise helped me to piece the drawing together like a jigsaw.
Plants and Flowers in Coloured Pencil
Aspects of the Drawing I am not happy with:
As always I wish I had read the brief again and again until I was clear on what I had to do but then this would have lead to a one or two plant composition  which would have probably been a lot less challenging.
I wish I had practised blending colours in my sketch book if just for the leaves and stems, although not all the leaves and stems are clearly visible I can see that I definitely could have improved on the blending on those parts of the flowers.
The final drawing is very sketchy although this is a big difference from some of the final drawings in part 1 of this and I know I allowed the the sketchy artist I researched earlier to influence me in this exercise I would have preferred a more realistic finished  drawing.

Wednesday, 14 May 2014

Drawing 1, Part 2 Observations in Nature, Detailed Observation, Line Drawing Detail

For this exercise I was to select an object with interesting detail such as a sliced through red cabbage or a fir cone. Then on a sheet of A4 paper create a line drawing of the object that I set up, taking time and effort to really look at the patterning, thickness of line, texture and shape of the overall composition. The brief also said that I was to position the drawing well on the paper and fill the paper effectively with a continuous line drawing and no shading which is what I TRIED to do...
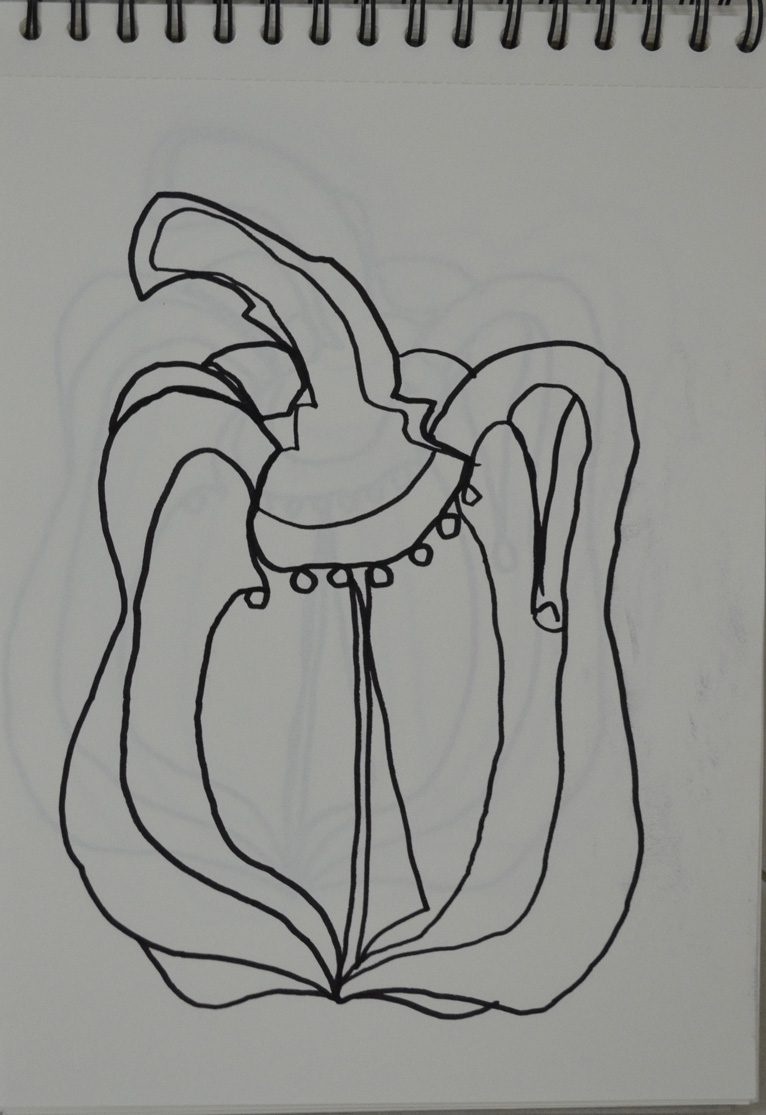
I made a few attempts at this with two different subjects, both of which were green peppers but in the Bangkok heat they go off pretty quick. With the first pepper every attempt was a continuous drawing with minimum detail, I used the thick nib of a double tipped felt pen and although the subject fit well on the paper, I didn't give it a strong enough light source to pick up all the detail and too be honest the finished drawings at that line thickness all looked somewhat pathetic.
Exercise - Line Drawing Detail First Subject
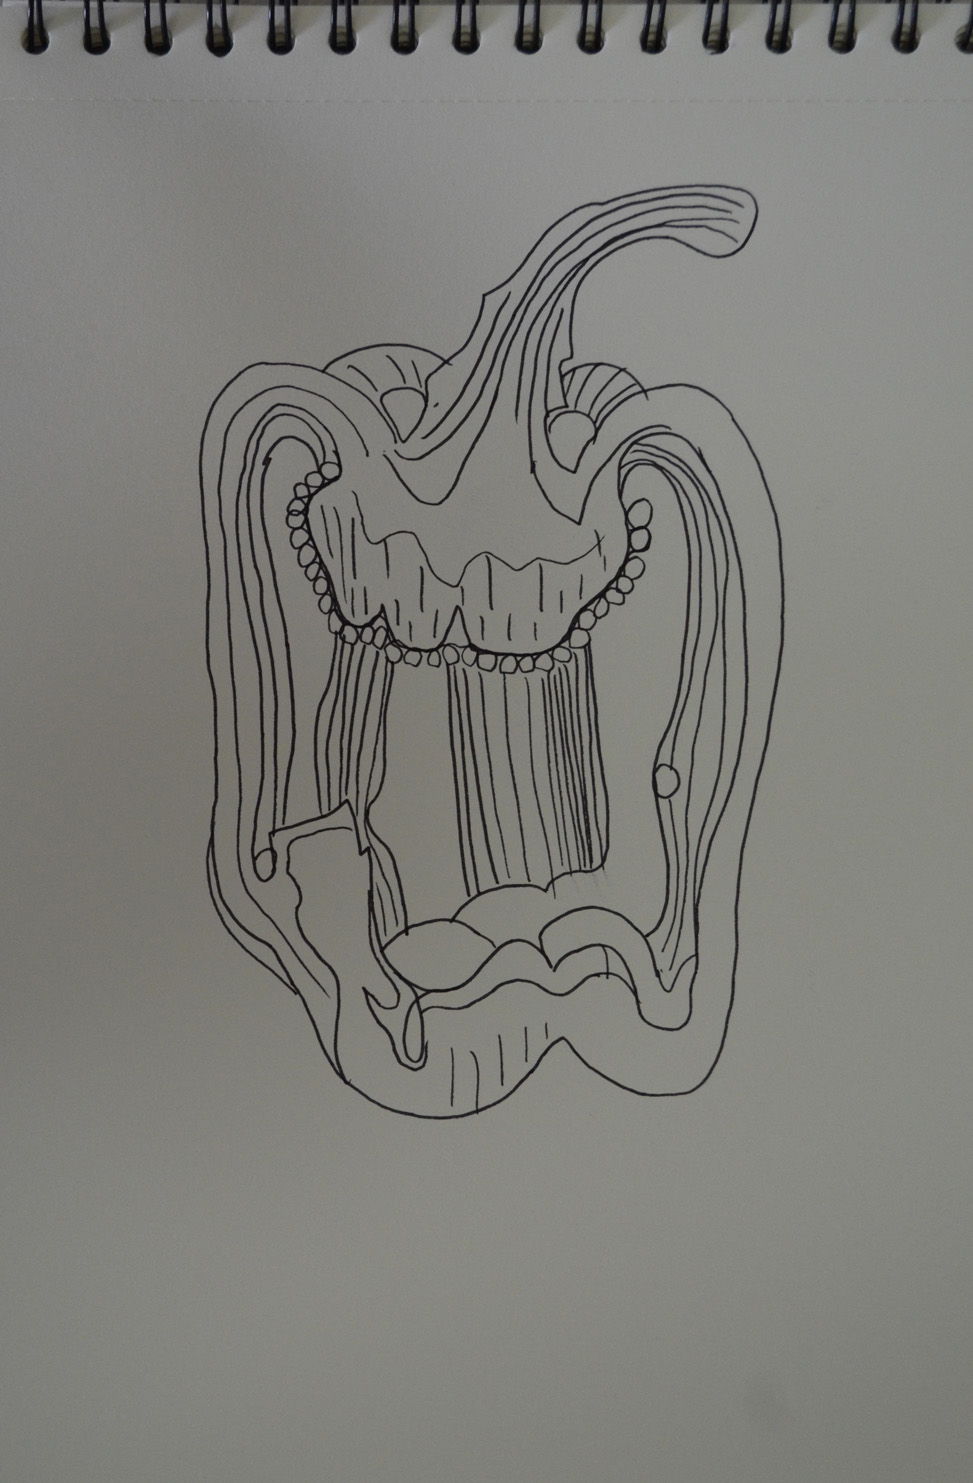
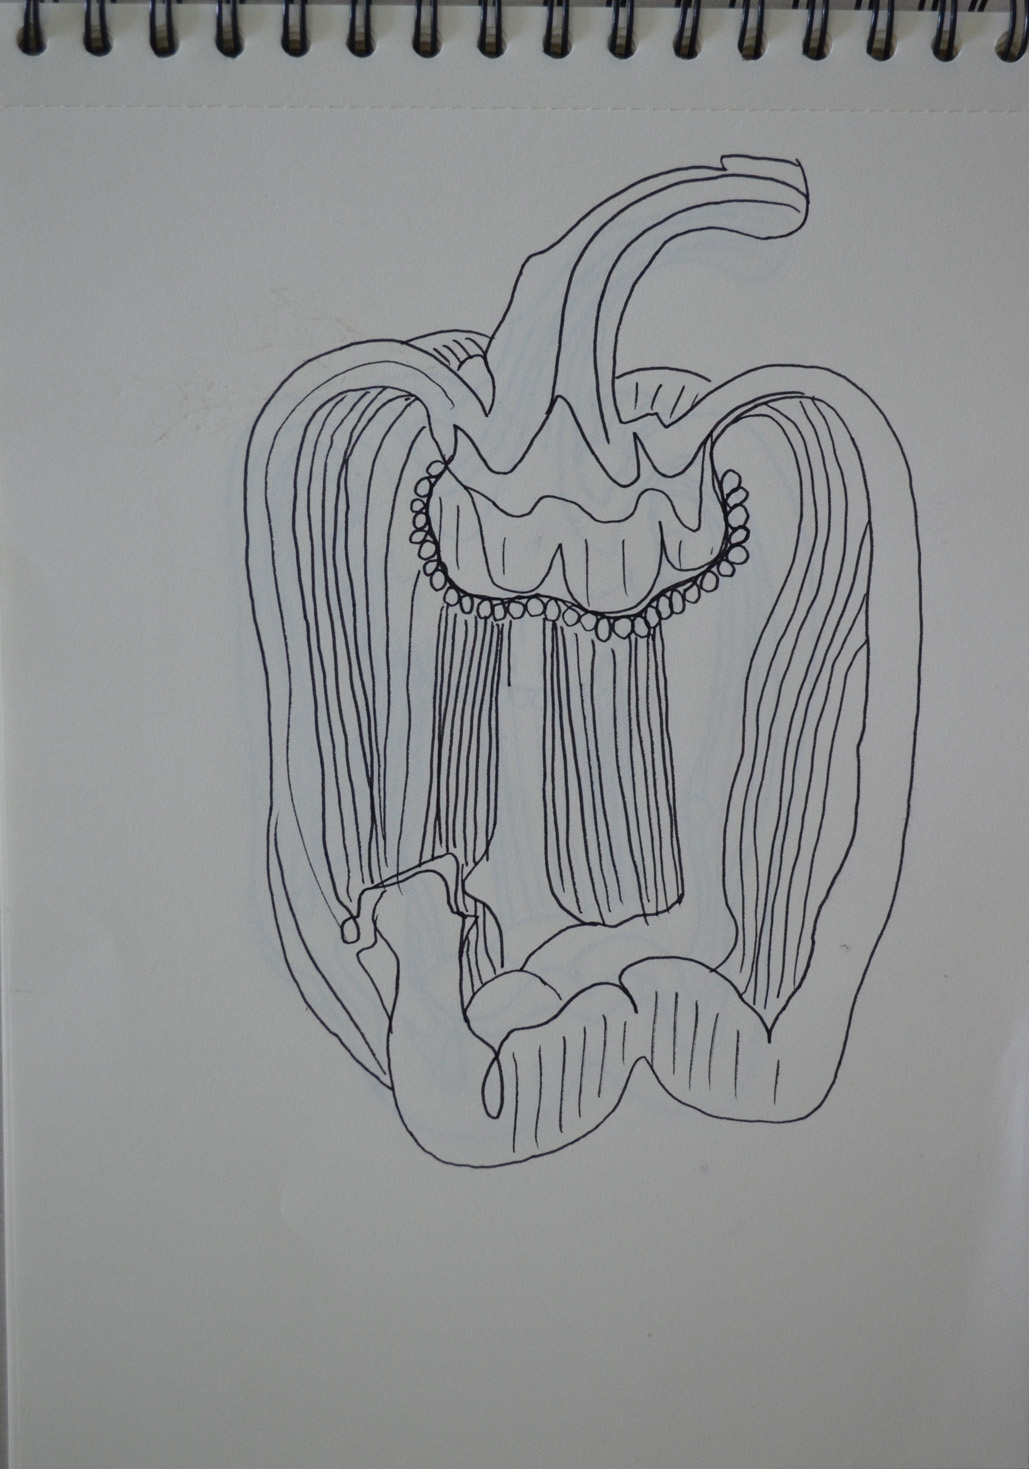
I gave it a week with another exercise in between before I had another go at this exercise. Visually the drawings with the second subject look a lot better, I used the finer nib of the felt pen and this time after I completed what I could do continuously without taking my pen off the paper I decided to add the detail which were the ribs on the inside of the pepper that I could see from wisely using a light source this time.
Exercise - Line Drawing Detail Second Subject 1
Exercise - Line Drawing Detail Second Subject - Image A
I probably did go a bit overboard and it does look like I have had a go at shading the object but this is all down to the closeness off the lines on the inside of the pepper. However I am quite happy with the results.
Exercise - Line Drawing Detail Second Subject 2
Exercise - Line Drawing Detail Second Subject - Image B
The thing that I am not happy with however is the positioning on the paper and how much space I left to the sides and underneath it. When drawing an object such as a pepper with a very irregular shape I think it's best if you know where to start, in Image A above I started at the core just above the seeds. With Image B I started at the tip of the stem Starting near the center of the image was better with this object but that would differ with something like a cabbage.

View my full Drawing 1 Learning log

Drawing 1, Part 2 Observations in Nature, Research Point, Masters of Detailed Drawing, 19th Century Thomas Hartley Cromek

For this research point I was asked to find two artists who exemplify mastery of detailed drawing.
I used to have a reproduction painting site and am familiar with the works and lives of quite a few but since starting this course I've been introduced to new artists and new techniques so I thought I'd carry that on by typing in a few keywords on Google to see where they took me.
The first artist I found was a 19th century artist called Thomas Hartley Cromek and after seeing that his place of death was Wakefield, my home town, I made the decision to research this artist a little more.
Born in London in 1809 Thomas Hartley Cromek was the son of Robert Hartley Cromek the  engraver and art dealer who allegedly cheated William Blake out of potential profits. In his childhood he moved from school to school starting off his education at Enoch Harrison's school in Wakefield and then onto the Moravian School in Fulneck. He then moved back to Wakefield to study at the grammar school there before returning to Harrison's.
Thomas Hartley Cromek received his first art lessons from a Wakefield based portrait painter, James Hunter but then in 1826 he moved to Leeds study landscape painting under Joseph Rhodes, while studying in Leeds Thomas also taught himself anatomical drawing.
He travelled to Italy in 1830 to study the old masters and spent most of the next 20 years within the country mainly in Florence eventually reaching Rome where he attracted much attention for his 'excellence in drawing and his careful colouring' - Wikipedia. While in Rome he gave drawing lessons to several distinguished visitors including the British artist and poet, Edward Lear.
Between 1831 and 1849 Thomas Cromek spent most of his time drawing the major buildings in Rome as well as Greece but then was forced to leave Rome with the outbreak of the first Italian War of Independence.
There's not much information about Thomas Hartley Cromek online about techniques, ideas, influences etc but I did find quite a few images.
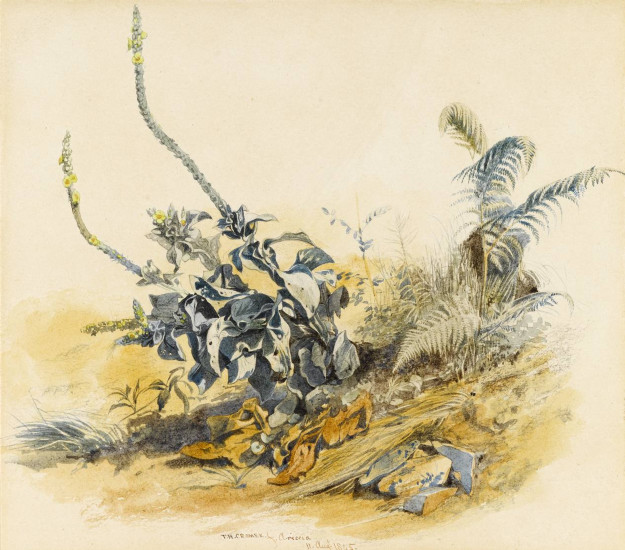
Study of Plants, Ariccia Watercolour, over traces of a pencil underdrawing.
Study of Plants, Ariccia
Watercolour, over traces of a pencil underdrawing.
I found many of his works online but it was the drawing above that caught my eye and I thought it was quite relevant to this module. The drawing itself is only 7 1/4 x 8 1/8 in in size and yet his brilliant use of shadow amplifies the detail of the drawing. I enlarged this image on my computer to the size he would have worked at and was amazed how much detail he has got into such a small drawing with what I still regard to be a messy medium, for me that is anyway. He has managed to depict some very thin leaves and blades of grass and makes this picture seem a lot bigger than what it is.
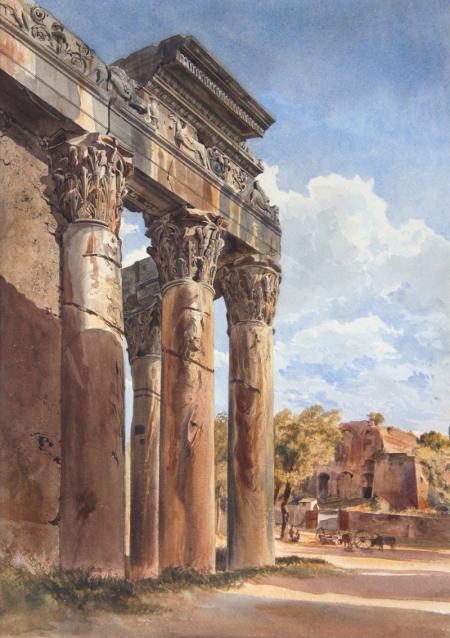
THE TEMPLE OF ANTONINUS AND FAUSTINA, FORUM, ROME - WATERCOLOUR 18 1/4 X 13 INCHES
 Just like his drawing of plants and flowers his watercolour paintings of buildings such as the Temple of Antoninus above shows brilliant detail and colour as well as amazing shadows which really amplify the bulkiness of the stone structure.
Bibliography

Drawing 1, Part 2 Observations in Nature - Research Point: Masters of Detailed Drawing - Modern Artist, Eliot Hodgkin

For this research point I was asked to find two artists who exemplify mastery of detailed drawing 1 from the 19th century or earlier and a modern artist. I already researched the 19th century artist Thomas Hartley Cromek in 'Masters of Detailed Drawing 1, 19th Century, Thomas Hartley Cromek' and it was now time to find a Modern artist. Again I wanted to find an artist that I wasn't familiar with so I started my search on Google looking for British artists of the 20th century. A list of names of British artists came up on Wkipedia so I went down the names looking at their work 1 artist at a time.
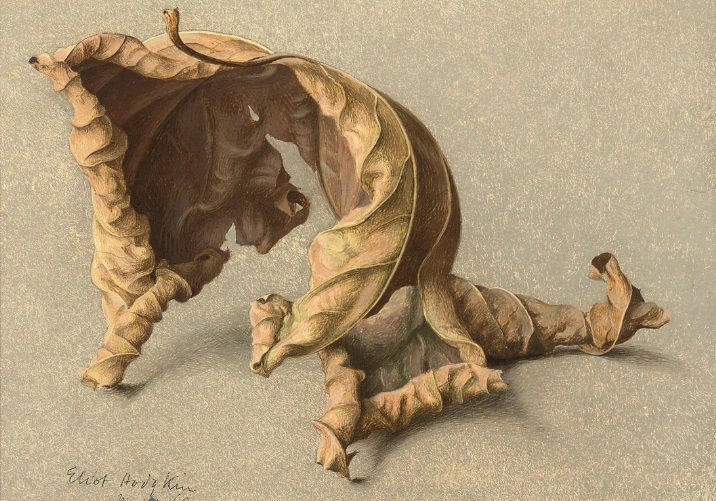
I came across the name Eliot Hodgkin, a name that I was very familiar with but I'm not sure from where so I took a look at his work to see if I recognised any of his paintings. I had never seen any of his paintings before but what I did see was truly inspiring and perfect for this part of the course. With the image below Large Leaf 2 particularly catching my eye as near my school there are some very similar large leafs that I would love to draw for this part of the course.
Eliot Hodgkin Large Leaf 2 Tempera on Card
Curwen Eliot Hodgkin was an English painter born into a Quaker family in Purley-on-Thames on 19 June 1905 and was the cousin of abstract painter Howard Hodgkin. Eliot Hodgkin was educated at Harrow School but his artistic life began at the Byam Shaw School of Art and then at the Royal Academy Schools where he studied under Francis Ernest Jackson.
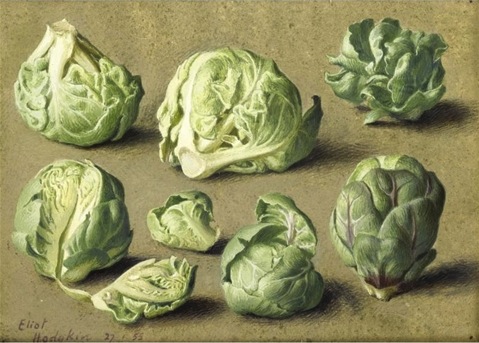
Eliot Hodgkin Seven Brussel Sprouts
Hodgkin had already established himself as a still life and landscape painter by the mid-1930s and regularly exhibited at the Royal Academy. In 1937 Hodgkin started working in egg tempera a recipe that was given to him by his close friend and former teacher Maxwell Armfield.
Hodgkin stated that he wasn't attracted to tempera as a medium as it was used by Italian primitives and their work did not do anything for him, he simply used tempera as it was the only medium that allowed him to express the unique character of the objects that fascinated him.
Hodgkin said that his conscious purpose was to 'show the beauty in natural objects'- that people would usually think unattractive such as 'Brussels sprouts, turnips, onions, pebbles and flints, bulbs, dead leaves, bleached vertebrae, an old boot cast up by the tide.'
When i did a search for his paintings and saw his work the first thing that went through my mind was how beautiful his paintings were and yet his compositions are so very simple. I have heard of tempera before but as far as I know I have never seen anything painted in it until now and I knew at firs glance that they were painted in a medium other than oil or acrylic.
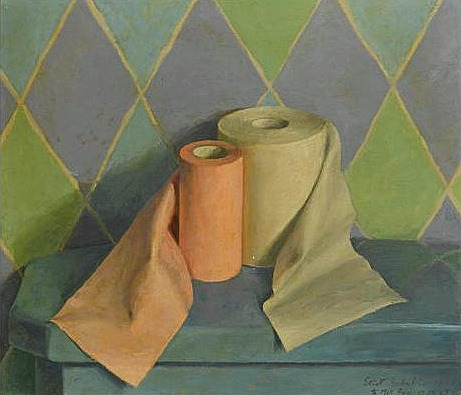
He depicts the texture of his objects wonderfully and his paintings are so crisp and life-like but still he manages to express them in a way that makes u aware of the beauty of these objects for the first time with wonderful contours and a brilliant balance of light and dark tone, whether it be a dead leaf or a toilet roll.
Toilet Rolls Eliot Hodgin
Like Eliot Hodkin Says ' People sometimes tell me that they had never really ‘seen’ something before I painted it, and I should like to believe this… For myself, if I must put it into words, I try to look at quite simple things as though I were seeing them for the first time and as though no one had ever painted them before.'
For me I agree with others that to see these objects in his paintings is to 'see' them for the first time with detail and beauty that you would never notice before. Hodgkin really makes you notice every part of the object, every leaf, every crease and every pattern on the objects surface.
Bibliography - Wikipedia

Drawing 1, Part 2 Observations in Nature, Exploring Coloured Media - Check and Log

Which of the media you have experimented with did you find the most expressive?
From experimenting with the different colour media in this exercise I would probably say at this stage that the oil pastel is the most expressive. Oil pastels seem to allow more sketchy fluid strokes and seems to work well with all the techniques that I have practised so far.
Which medium do you think lends itself to more detailed work?
From what I have seen so far I would say coloured pencils as well as ball point pen but then again I do not think I have worked with nib pens and ink enough at this stage to dismiss these as a medium for more detailed drawings